WordPress is ideal for creating a website or blog. You can quickly build and keep up your website with WordPress. It’s a powerful and user-friendly CMS.
One popular approach to installing WordPress is through cPanel, a web hosting control panel. This step-by-step instruction will let you automatically install WordPress in cPanel.
Whether you’re a beginner or an expert, this article will help you set up your WordPress website. Start your WordPress website journey to create a beautiful and effective website!
Before installing, determine your hosting needs based on your website’s traffic and resources. Choose a scalable, secure, and customer-friendly hosting company.
We already showed you how to set up WordPress on a local server. We will talk about how to install WordPress in C-Panel today. This is a very easy job that can be done with just one click. Now let’s look at how to set up WordPress on cPanel.
Install WordPress in cPanel
Login to the cPanel of the domain where WordPess will be installed . Now click on Softaculous Apps Installer from the Software tab. If you can’t find it, search for Soft in cPanel and you will get Softaculous Apps Installer
Note: Many cPanel servers do not have Softaculous and at that time a video tutorial on how to install WordPress is given below.
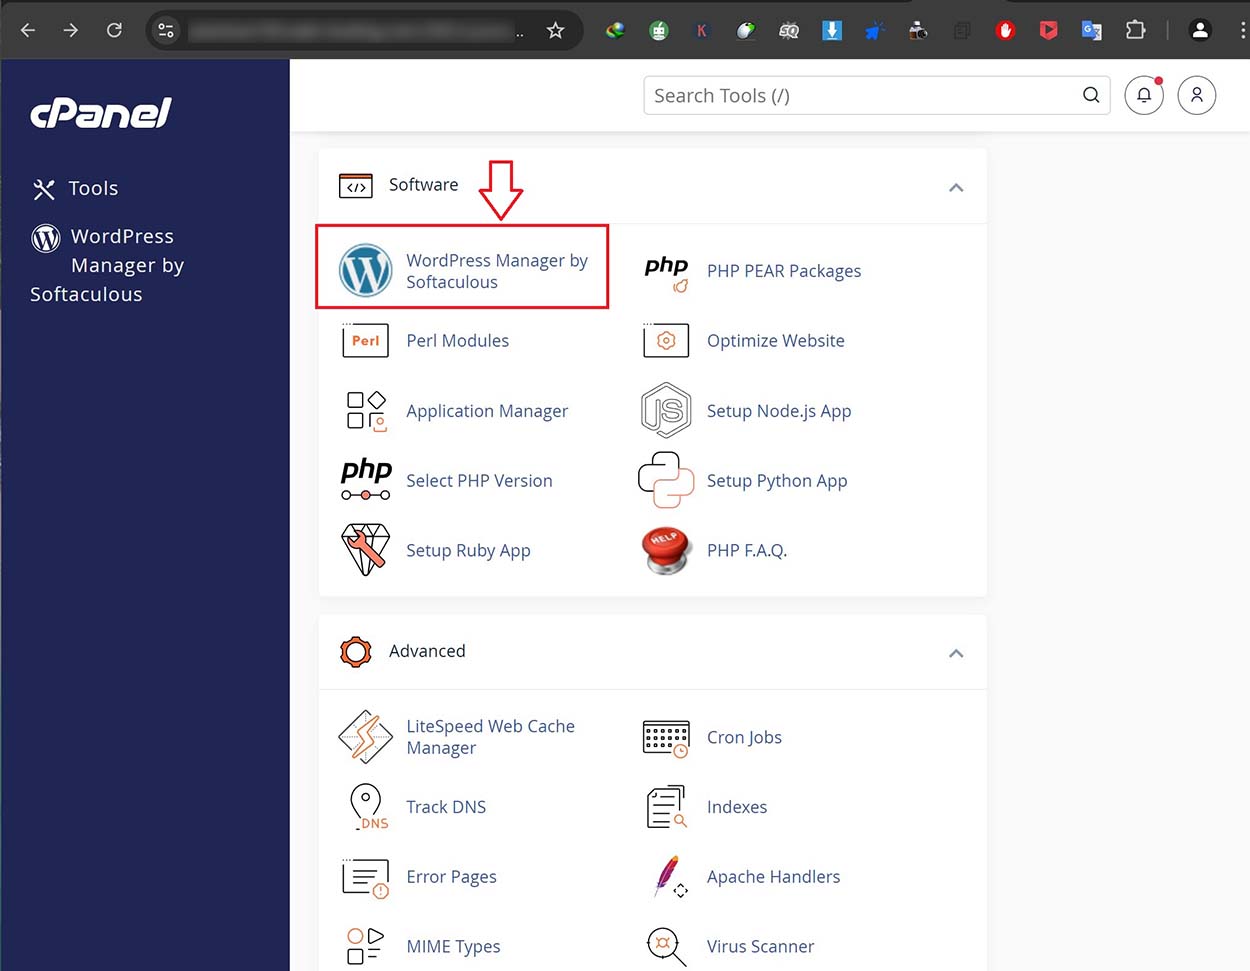
When you click on Softaculous Apps Installer, the next part will show up. If you move your mouse over WordPress from that point on, you will see several sections: Install, Demo, and Details. Now click on Install.
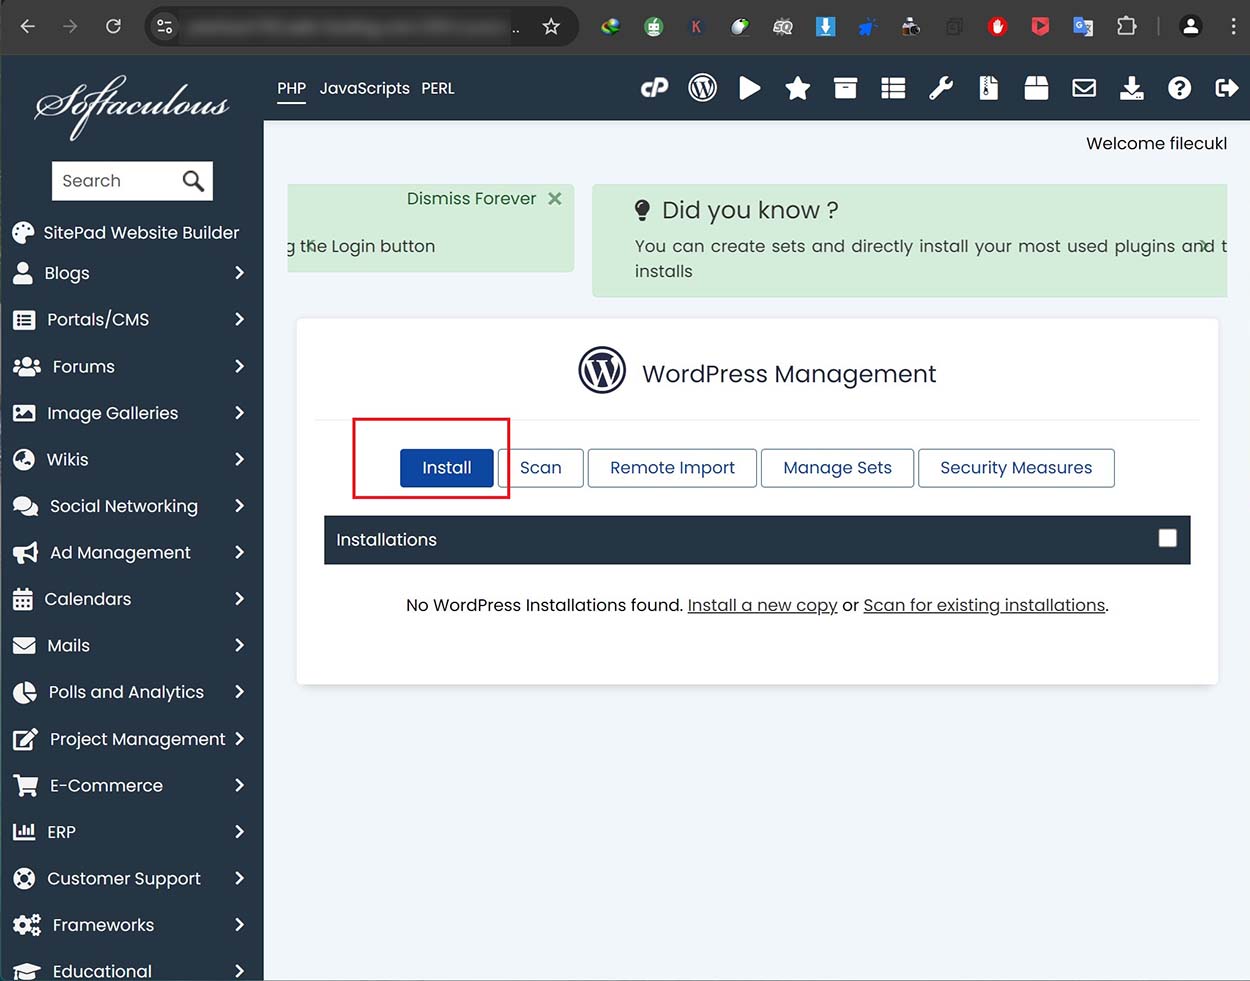
WordPress also includes a shortcut on the cPanel home page’s Softaculous Apps Installer tab.
Now WordPress is ready to install and will ask you some data. This is a very important place where the information about your WordPress site admin, password, site address, etc. will be taken.

A screen shot of the page is shown above in the WordPress installation page. Now let’s discuss the steps one by one…
WordPress site address and directory
At the very beginning of the section called Software Setup, from the right side of Choose Protocol, decide what will be the protocol of your site.
Specify here how you want the address on your website. Right after this, there is Choose Domain; usually there is only one domain name here. But if the site has sub-domains , then more than one will show.
Now the rest is In Directory. Suppose your web address is www.bijoykeyboard.com. You want people to find your WP (abbreviation of WordPress) site when they go to bijoykeyboard.com.
Then leave the In Directory cell blank. And if you want your site to be found when you go to bijoykeyboard.com/newsite, then write newsite in the In Directory field.
Site Settings and Admin Account
This is the 2nd section where you have to specify the name of the site. So write the name of your site in the field of Site Name.
As in our case, cryptogaraz.com. Now after this, there is the site description. Write here a light description of your site or a slogan like we have “All Crypto News.”
Enable Multisite (WPMU) is actually used to set up multiple sites in the same WordPress. But we won’t be running multiple sites right away so there’s no need to tick here.
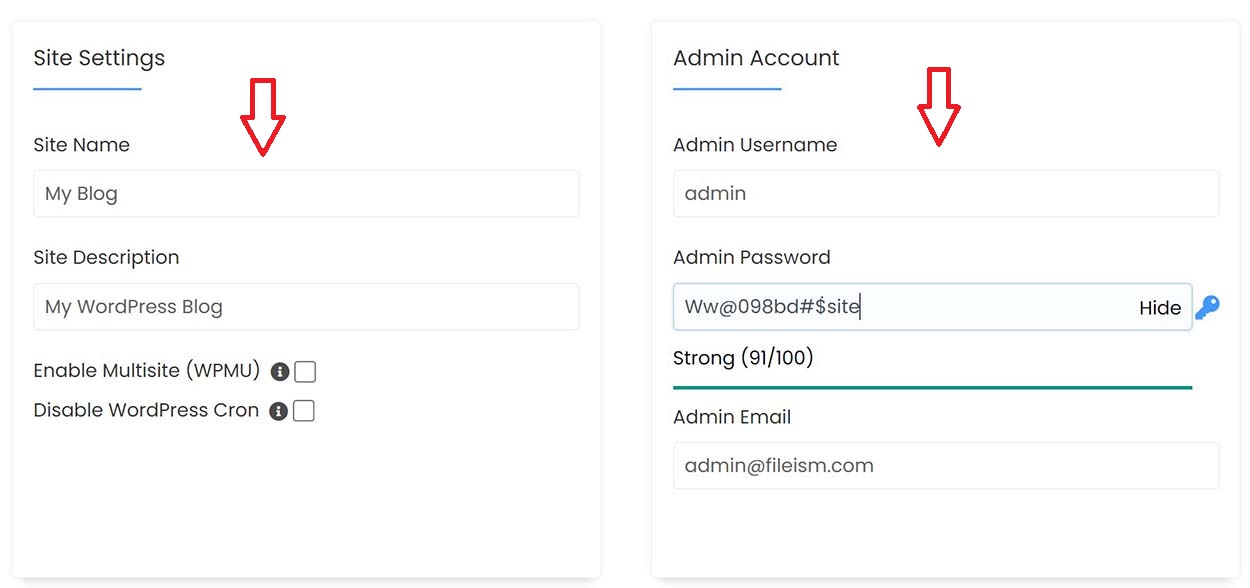
While giving WP Setup, the role of the first user is either admin or administrator, and the admin can do everything on the WordPress site.
So on the right side of Admin Username, write what you want as a username. Usually everyone uses admin, but I recommend another username because it increases the security of your site.
Enter your password in the Admin Password field. But make sure that your password is a strong password. If not, your site is likely to be hacked.
Enter your email address in the Admin Email field and keep it secure because if you ever forget your WP password, you can recover it using this email and many information about your site can be sent to your email.
Choose Language and Select Plugin(s)
From here you can fix the language of your site, WordPress site also supports Bangla, but initially I will recommend keeping the language English. So there is English on the right side of Select Language; keep it.
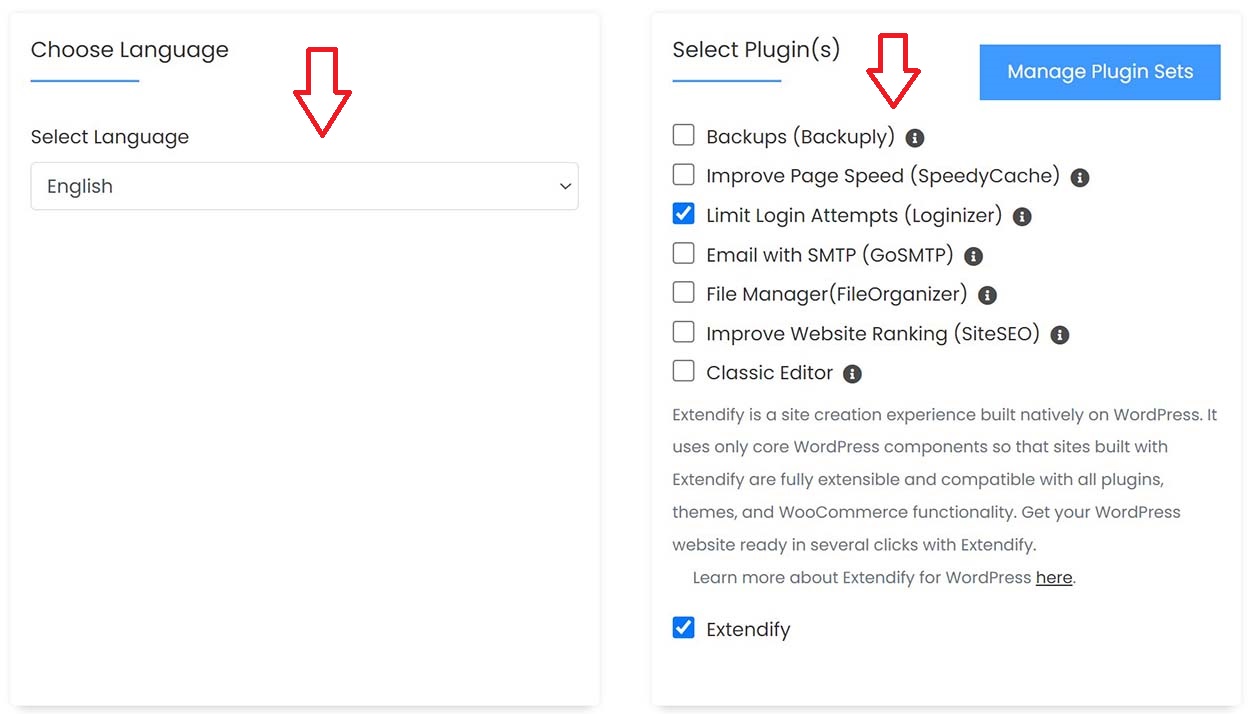
Here there is an option to install a plugin which will make Login Attempts Limited on the site. In fact, many people try to login to the admin panel to hack the site.
Its option to stop or can be said to control it. But we will install a functional plugin later. So leave it now.
Advanced Options
Advanced Options are usually closed and have a + sign in front of them. Click on it to open it. You will see several options open as below.
This will continue without changing anything. But there are some really advanced options that are useful for your site.
Select Theme and Install
You can select a theme of your choice from Select Theme. We won’t do it now; we’ll talk about the theme later.
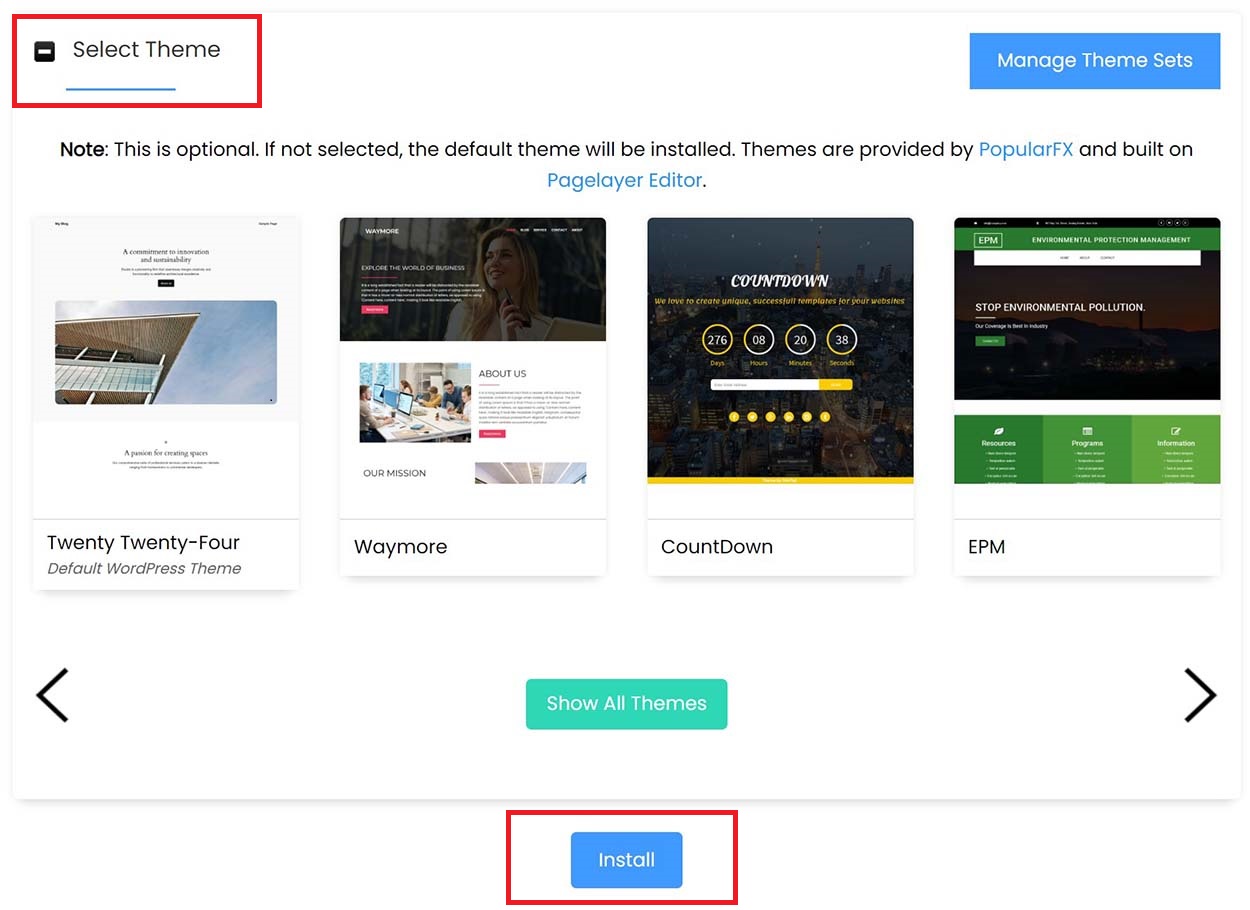
Install now if everything is fine. But if you think that your site’s information should be sent to an email, then enter your email address to the right of Email installation details in the box below. If everything is fine, the installation will start, and the progress bar will appear as shown below
After a while, the installation will finish and the web URL will show. Now login to the WordPress dashboard to work on your site.